So many items, so little time
Recently, a team at work asked if the task of updating ~4200 items in a SharePoint list could be automated. The manual process was something like this:
First, team A exports a SharePoint 2016 list to Excel and sends the Excel file to team B.
Second, team B updates a date field to indicate when the request was processed. (Requests were being processed hundreds to thousands in a single day.)
Next, team B then sends the Excel file back to team A.
Finally, team A updates the hundreds or thousands of items in the SharePoint list.
As you can imagine, updating that many items takes a lot of time. Updating them in bulk would save team A hours of work each week.
I recommended using Power Automate for the bulk updates because it can read from an Excel file. However, that Excel file has to reside in SharePoint Online or OneDrive for Business. My company doesn’t allow confidential data to be stored in the cloud. Luckily, each SharePoint list item has a unique ID, and that was all we needed to match the items in the Excel file with the items in the SharePoint list.
Coming up with the idea was much easier than building the flow. With the help of my colleagues, some friends, and people in the Power Addicts community on Twitter, I was able to complete the request. It probably took longer than manually updating the items, but now I have information and experience to share with you. Good luck!
Create the Excel File
1 . Create a view that includes only the list items that need to be updated. (Each view must contain less than 5,000 items. If necessary, create multiple views.)
2. Export the list from the new view.
3. Save the Excel file as an .xlsx file.
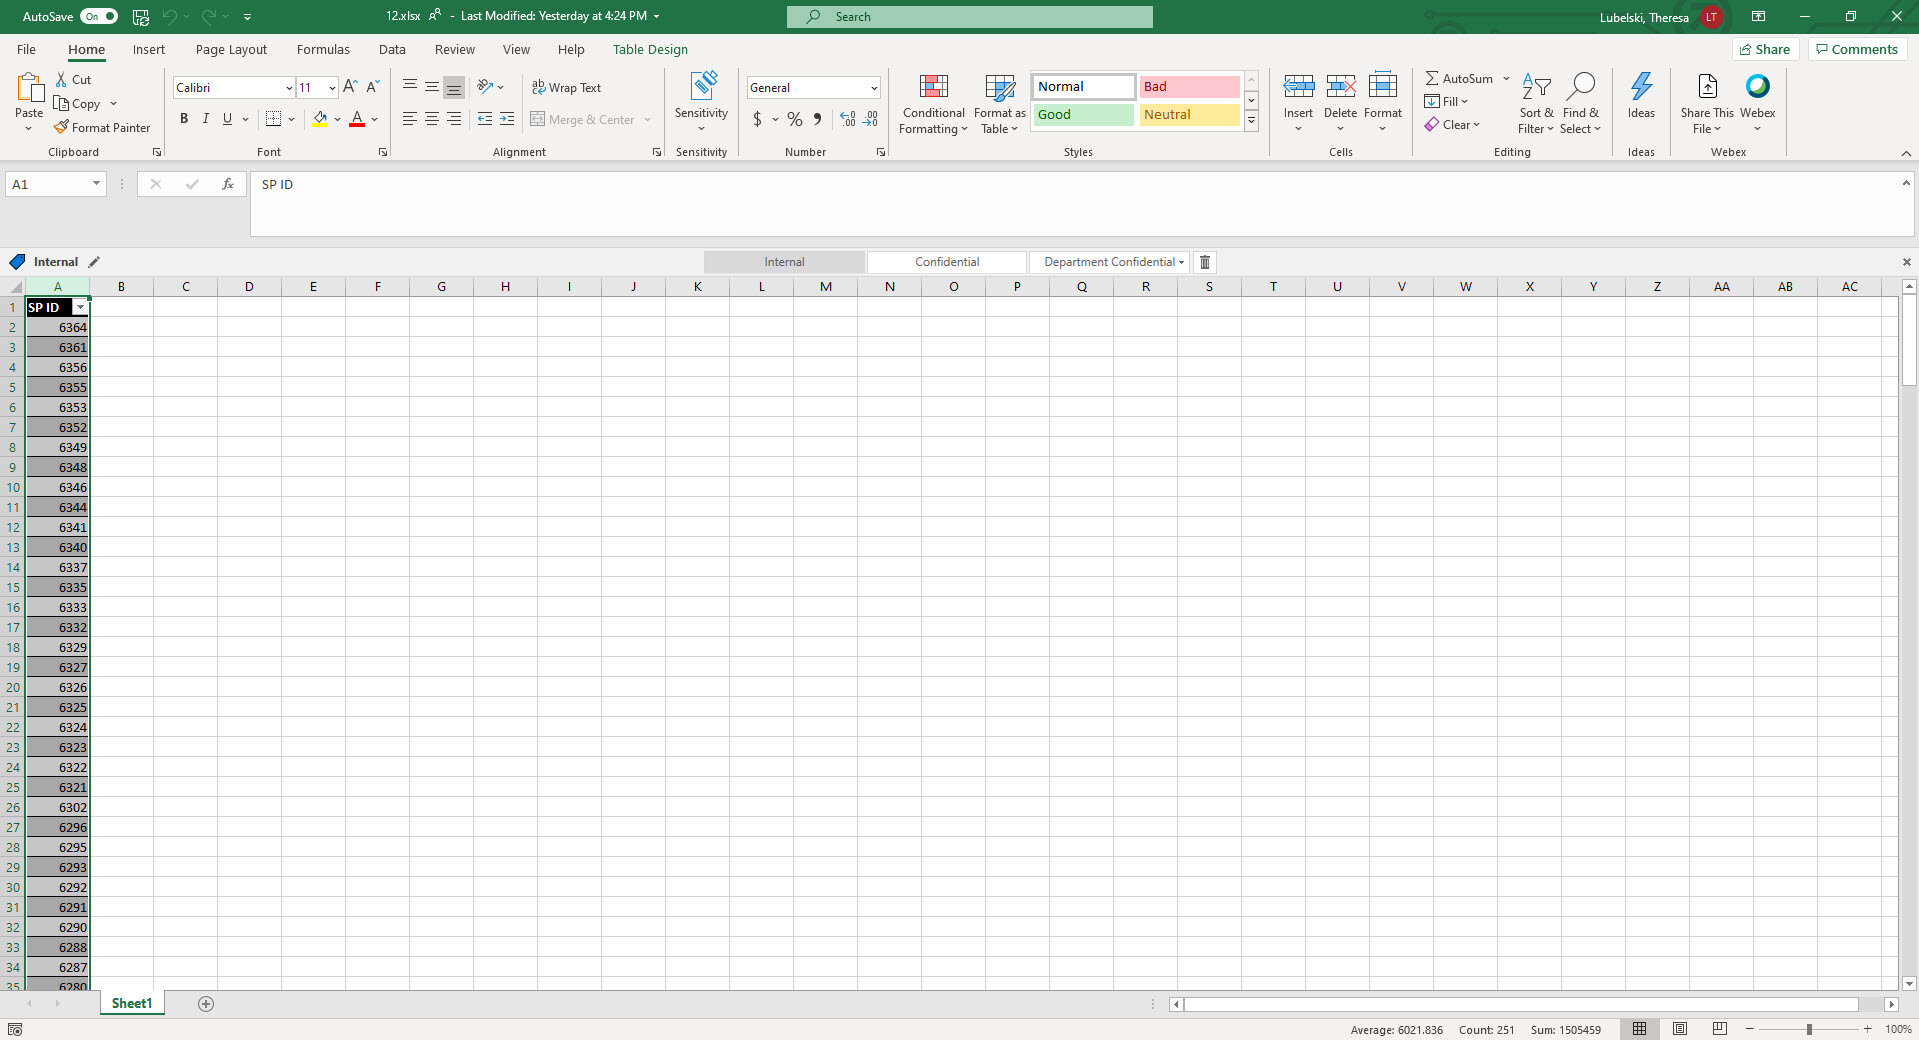
4. Delete all the columns except ID.
5. Format the ID column as a table.
6. Navigate to the Data tab and click Unlink.
7. Save the file.
Although the Excel file will appear to contain only the number of items in the view, there may be blank rows that Power Automate will try to process. You can use Power Query to remove the blank rows in bulk.
1. Open the .xlsx file in the Excel client.
2. Check the Count value in the bottom right.
3. Navigate to the Data tab.
4. Click From Table/Range.

5. Power Query will open in a separate window.
6. In the Power Query window, check the Count value in the bottom left.
a. The data preview in Power Query only looks at the first 1,000 rows. If the Excel file has more than 1,000 rows, the Count value will display as 999+.
b. If the Count value is higher than expected or shows 999+, I recommend continuing with these steps to delete blank rows. It is much faster than waiting for Power Automate to iterate through phantom rows.
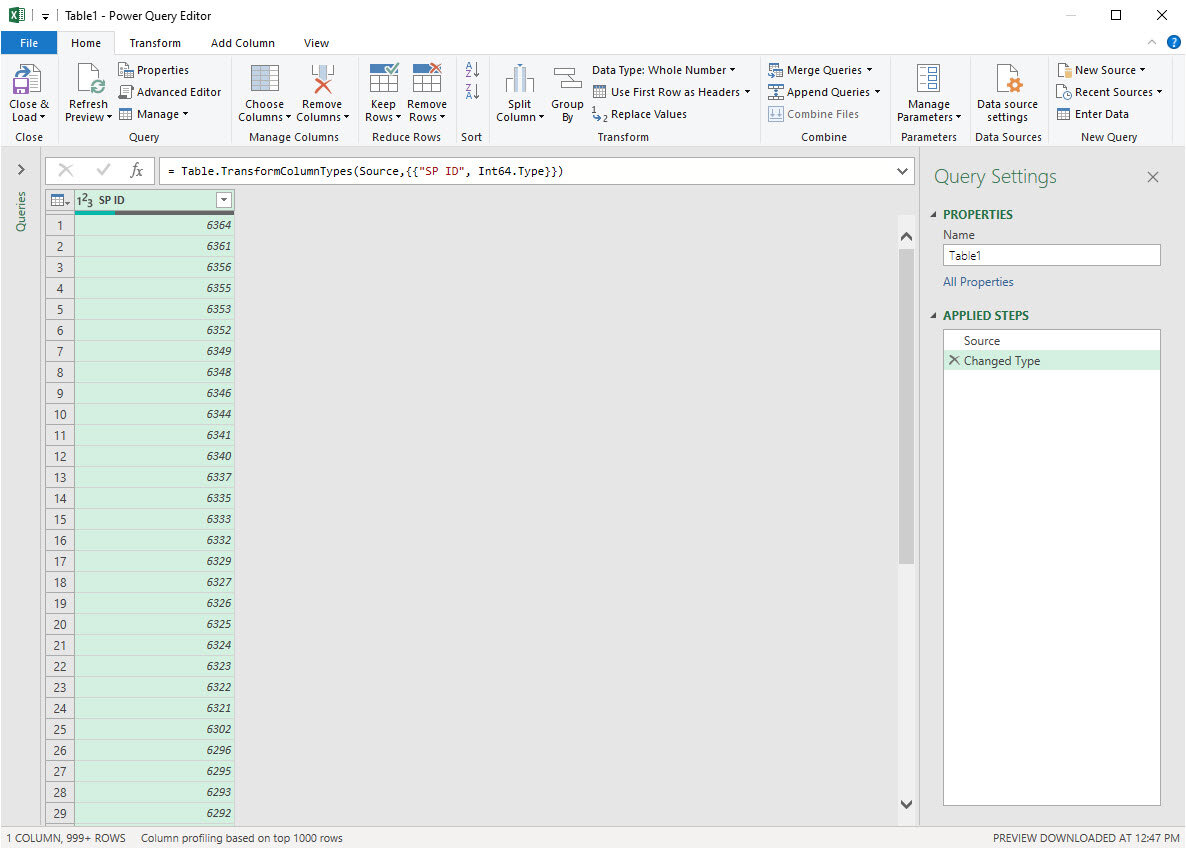
7. Click Remove Rows.
8. From the Remove Rows menu, select Remove Blank Rows.

9. Click Close and Load (far left on the ribbon) to apply the changes.

10. In the Queries and Connections pane, check the number of rows loaded. It should reflect the number of expected rows.

11. Because Power Automate creates a new table in a new worksheet, you should now delete the original worksheet. (The less Power Automate must iterate through, the faster the flow will complete.)
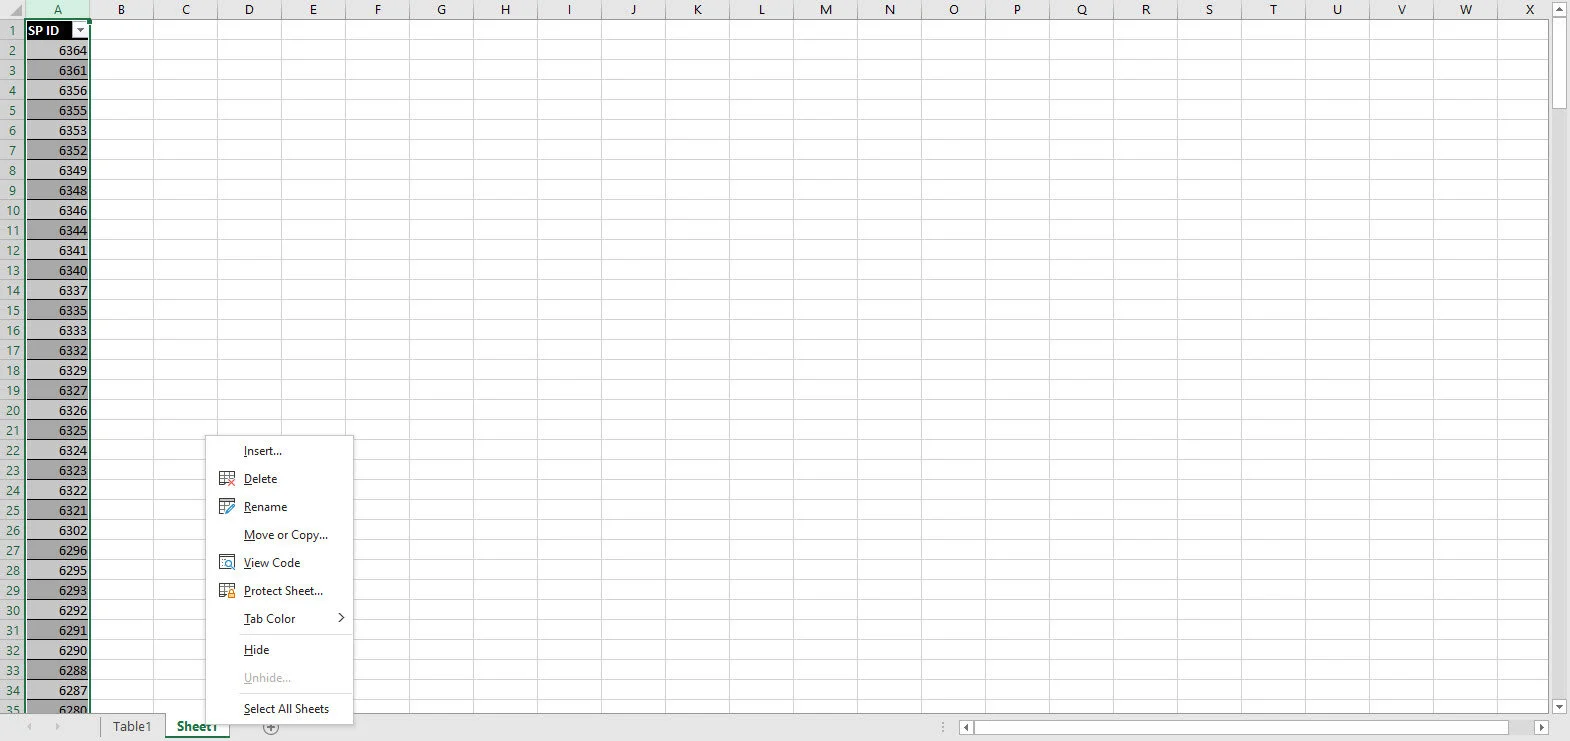
a. Right-click on the worksheet (Sheet1).
b. Click on Delete.
c. Click Yes to confirm the deletion.
12. Save and close the Excel file.
13. Upload the Excel file to a document library on a SharePoint Online site.
Update SharePoint On-Premises List Item from Excel File
1. Create a new Automated cloud flow.
2. Select the SharePoint trigger When a file is created (properties only).
a. In the Site Address field, select the SharePoint Online site where the document library resides.
b. From the Library Name dropdown, select the document library where the Excel file was uploaded.

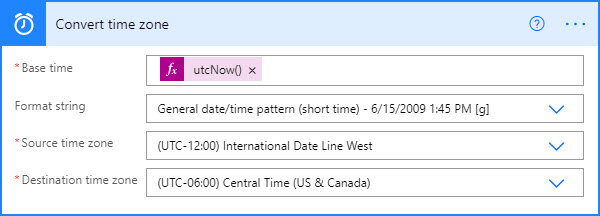
3. Add the action Convert time zone.
a. For Base time, use the expression utcNow() to get the current date and time.
b. Select the desired Format string. The drop down has examples of each option.
c. Select the Source time zone that matches the Base time (e.g., UTC).
d. From the Destination time zone dropdown, select the appropriate time zone.
4. Initialize two variables using the Initialize variable action.
NOTE: The variable name can be anything. Using a standard format such as var (lowercase) followed by the variable name (using title casing) keeps the variables clear and identifiable through the flow. Another best practice is to keep the variable name all one word.
5. Create varID as type String with a value of 0. This variable will represent the ID of the item from the SharePoint list.
Optional: Rename the action to Initialize varID.

6. Create varIntID as type Integer with a blank value. The value will be set later.
Optional: Rename the action to Initialize varIntID.

7. Find and select the Excel Online (Business) action Get tables.
a. From the Location dropdown, select the same SharePoint Online site from the trigger.
b. From the Document Library dropdown, select the same document library from the trigger.
c. Click within the File field and then, from the Dynamic content pane, select Identifier from the When a file is created (properties only) section.

8. Add an Apply to each action.
Optional: Rename the action to Apply to each table.
9. For Select an output from previous steps, click on value under Get tables in the Dynamic content pane.

10. Within the Apply to each table action, add the List rows present in a table action.
Optional: Rename the action to List rows present in first table.

11. From the Location dropdown, select the same SharePoint Online site from the trigger.
12. From the Document Library dropdown, select the same document library from the trigger.
13. In the File field, click the folder icon at the right and then select the Excel file.
NOTE: This step hardcodes the file name but will be changed later to make the file name dynamic.
14. In the Table field, use the dropdown to select a table name.
NOTE: This step hardcodes the table name but will be changed later to dynamically select the first table.
15. Under the List rows present in a table action, add another Apply to each action.
Optional: Rename the action to Apply to each row.
NOTE: This is the first of two nested Apply to each actions.

16. This time, for Select an output from previous steps, click on value under List rows present in a table in the Dynamic content pane.
17. Add a Set variable action.
Optional: Rename the action to Set varID.
a. From the Name dropdown, select varID.
b. Click inside the Value field and use the Dynamic Values pane to select the name of the column within the Excel file.

18. Add another Set variable action.
Optional: Rename the action to Set varIntID.
a. From the Name dropdown, select varIntID.
b. Click inside the Value field. To switch the Dynamic content pane to Expressions, click on the Expressions tab.
c. Scroll down to the Conversion functions section.
d. To populate the fx field, click on int(value).
e. Put the cursor between the open and close parenthesis and then click on the Dynamic content tab.
f. Click on varID under the Variables section. This will convert the value in the varID field from a string to an integer.
NOTE: The expression should now read int(variables('varID')).
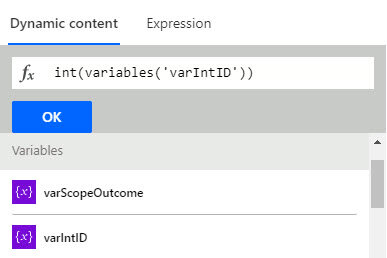
g. Click OK to add the expression to the Value field.
19. Go back to the List rows present in table action.
20. Delete the values in the File and Table fields.
21. Click within the File field and then, from the Dynamic content pane, select Identifier from the When a file is created (properties only) section.
NOTE: This step removes the hardcoded file name and enables dynamic selection instead.
22. Click within the Table field and then click on the Expressions tab.
23. In the fx field, type the following: first(outputs('Get_tables')?['body/value'])['id']
NOTE: This step removes the hardcoded table name and enables dynamic selection instead.

24. Add a Get items action.
Optional: Rename the action to Get items from SharePoint list.

25. In the Site Address field, type the URL for the SharePoint on-premises list. Then select Use [URL] as a custom value.
26. From the List Name dropdown, select the name of the list to update.
27. In the Filter Query field, type ID eq and then, from the Dynamic content pane, click on varIntID under the Variables section.
NOTE: Reducing the number of columns returned improves the performance of the flow.
28. Optional: In the Limit Columns by View field, use the dropdown to select the view created in step 1 of Create the Excel File.
29. Add an Apply to each item under the Get items action.
Optional: Rename the action to Apply to each item.

30. This time, for Select an output from previous steps, click on value under Get items from SharePoint list.
31. Within the Apply to each item action, add an Update item action.
Optional: Rename the action to Update item in SharePoint list.
32. In the Site Address field, type the URL for the SharePoint on-premises list. Then select Use [URL] as a custom value.
33. From the List Name dropdown, select the name of the list to update.
34. Click inside the ID field and then click on the Dynamic content tab.
35. Click on varIntID under the Variables section.
36. For each field displayed, click on the corresponding field name in the Dynamic content pane.
37. Click Save (at the bottom after the last action or at the top right of the canvas area) to complete the flow.