
SharePoint Online has a new navigation option: megamenu. In a January 2019 blog post, Microsoft Senior Product Manager Mark Kashman wrote, “The new Megamenu options allow for multiple levels of hierarchy at once - no cascading fly-outs needed. This will enable you to better organize and showcase the content and sites.” Megamenus offer three levels of navigation: a header, a sub-header, and a sub-link.


Creating a megamenu is simple, but can be a little tedious. Here’s how you do it.
First, navigate to the SharePoint site where you want to create a megamenu. I used a Communication site called megamenu. Second, click the cog wheel in the top right, on the suite bar. Then click Change the Look. Click Navigation and then select Megamenu. Click Save.
Second, click Edit on the top (global) navigation.

The editable navigation links now appear on the left. Place the cursor where you want to add a new header or link, and then click on + (plus sign).

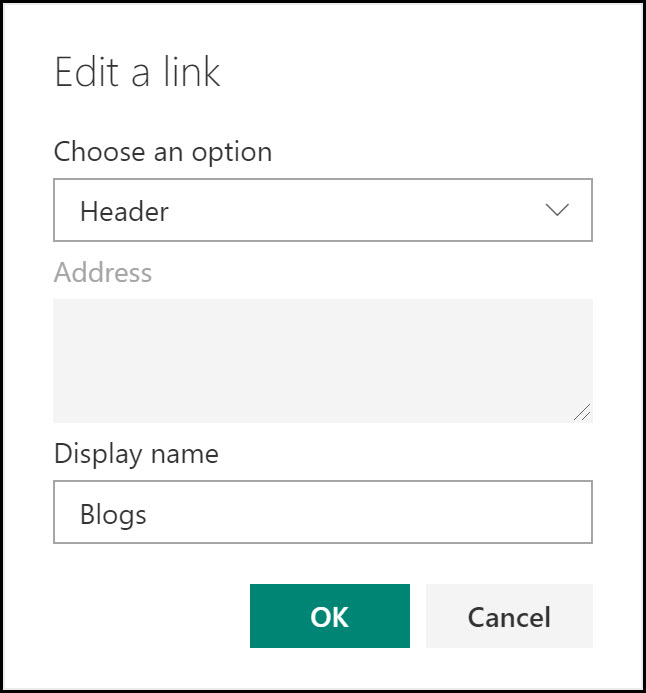
Under Choose an option, select URL or Header.
Header will add a first- or second-level header, such as Resources or Blogs. In the Display name field, type the title of this header.
URL will add a sub-link at the third-level of the megamenu navigation. In the Address field, type the URL for the site.
Best Practice: For a SharePoint site, enter the relative URL. (e.g., /sites/megamenu)
Headers can become sub-links, and vice versa. In edit mode, click on the ellipsis (…) to the right of the header or sub-link. For a top-level header, click Edit and then change the option to URL. Enter the URL and, if necessary, change the Display name. To change a second-level header to top-level, click the ellipsis and then click Promote sub-link. To make the second-level header into a URL, click the ellipsis and click Edit. Change the option from Header to URL, and add the URL. Click OK.
To re-order the megamenu, click the ellipsis next to a header or sub-link and click Move up or Move down. Alternatively, you can drag-and-drop. Everything under the header (whether first- or second-level) will move accordingly.
Clicking Remove will delete the header or sub-link and everything under it.
Once your changes are finished, scroll to the bottom of the pane and click Save. Until you click save, you can click Cancel to undo all of your changes since the last time you clicked save.