
The Modern SharePoint experience, which is now available in SharePoint Online as well as SharePoint Server 2019, has brought a breath of fresh air to intranet users and designers. However, site creators are still faced with the age-old question: Which type of site do I create? (For information about creating sites, check out Create a Team Site in SharePoint Online and Create a Communication Site in SharePoint Online.)
My first assumption was that a modern Team site URL would use /teams and a modern Communication site would use /sites. But that’s not the case. Thanks to a drop down box in the SharePoint Admin Center Settings, the URL for the new site will contain “/sites” or “/teams", with the former being the default option. This means you can have a modern Team site with an Office 365 Group at https://mytenant.sharepoint.com/sites/example.
So how can site creators choose /sites or /teams without giving them permission to the SharePoint Admin Center? They can’t. However, they can fill out a custom form, which can be connected to the See other options link when creating a Communication or Team Site.
The first step to connect the site request form is to go back to the Settings in the SharePoint Admin Center. In the Site Creation section, there is a checkbox for “Use the form at this URL.” Checking the box and entering the URL of a form will allow site creators to “create sites from a custom form” and then “access the form by clicking See other options when they're creating the site.”

Figure 1: Site Creation settings from the SharePoint Online Admin Center
Second, create a form. Where? Using what? Since I could not find a definitive answer, I created a form in Microsoft Forms. Unfortunately, when I clicked See other options, I was taken to a Forms page with the error “This form doesn’t exist.” Long story short, a Microsoft Forms form will not work.
Does a SharePoint list form work? Yes it does! (Why didn’t I start there?!?) I recommend creating a custom list with (at least) the following columns:

Figure 2: New item form in SharePoint
Site Name (maybe use the default Title field for this)
Site type (Communication or Team)
Site owners (there should be at least two)
Other permissions (members of the Office 365 group, if applicable; names of people to put into the Members and Visitors groups)
If you want the See other options link to go directly to the page for creating a new item in the SharePoint list, be sure to change the URL ending from /allitems.aspx to /newform.aspx .
Alternatively, you can set up self-service site provisioning. One way is through the PnP Provisioning Engine - Self-service site collection provisioning project, which is available on Github. The URL for the web UI would be inserted into the SharePoint Admin Center settings field “Use the form at this URL.”
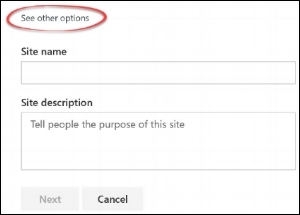
Figure 3: See other options link in the Create Site window
Finally, it’s time to create a new site! If you are the SharePoint Admin, you can create a new site from the new SharePoint Admin Center. Click “Active Sites” and then simply click “Create Site.” To navigate to the custom form, select Team or Communication and then look for See other options in a tiny font at the top of the window.